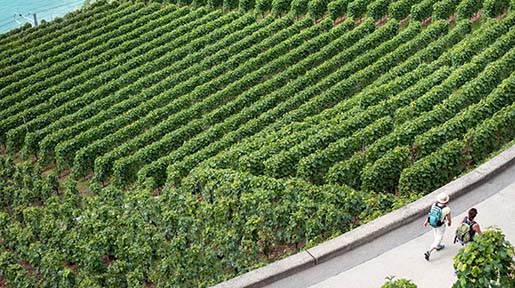
Harvest is that magical time when the baton is handed from the grape grower to the winemaker. The crop has been carried from bud break through flowering, fruit set, veraison, and maturation. For the last stretch of this process, the winemaker should be in the vineyard frequently, in close contact with the grapes with which they will be making wine. Selecting the correct picking date can be the difference between making an incredible wine or merely an acceptable one.
The question is how do you know when the grapes are ready to harvest?
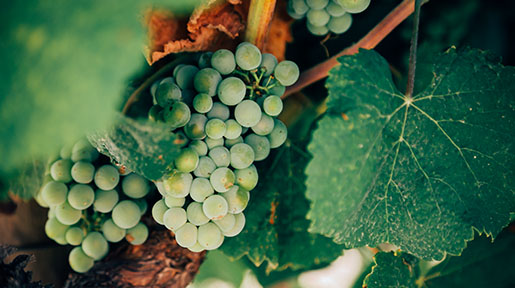
What we look for in the vineyard is complicated, multi-fold, and subjective. Depending on the style of wine you are making, the sugars and acids will have arrived at a cross point of balance between pH and sweetness that is to your liking. The flesh/skin of the grape should be firm, yet supple, not dehydrated. The juice inside will be sweet rather than tart. The pips/seeds should be browning, if not brown.
We are looking for a sweetness level of about 25-26 brix for most table wines. The ratio of sugar to potential alcohol is about one-half. A measure of 26 brix should result in a wine of about 13% alcohol by volume (abv).
The pH of the must/juice should be in the range of 3.1 – 3.75. A simple testing kit is helpful for measuring pH. Green grape must typically falls on the lower side of the scale. Black grape musts will be closer to the high end. The simplest way to think about it – the closer the number is to 3, the more tart the wine will be.
There are variations to this assessment for each variety and every winemaker, not to mention every vintage.
So, you’ve done your homework. You’ve been attentive to every detail in the vineyard and your grapes are ready to harvest. You make the call and the grapes are picked. The grapes arrive at your micro-winery intact. There is no mold between the clusters, and no dehydration or broken grapes, any animal damage, etc. The baton has been successfully handed off. It is your job to carry it to the finish, a clean, delicious bottle of wine.
Green grapes will be processed with their stems intact. The stems act as a structural filter for the juice to fall out as they are pressed into a gelatinous mass. Simply press the must/juice out of your green grapes and pump/transfer the juice into a cool storage tank to settle any unwanted lees over night. A good grapes-to-juice ratio is 150 gallons +/- per ton for green grapes, with the right equipment.
It is true, the harder you squeeze the grapes the more juice you will get, but the harder you squeeze the less pleasing the wine will taste in the end. Also, aggressive treatment of the grapes (i.e. hard pressing) can result in a higher pH. The higher the pH, the more likely you are to encounter problems in the end – unless you acidulate the must/juice/wine before, during or after the fermentation.
Important: Adding sulfur to the must/juice during processing is helpful in preventing unwanted oxidation, bacterial growth, and weak wild yeasts from commandeering your intentions for a safe and controlled fermentation.
Recommended dosages of sulfur should hover around 60 parts per million (ppm) at this point. Many sulfur suppliers will include a suggested dosage with their packaging. Follow the instructions and be careful, sulfur can be dangerous if mishandled. Traditionally, black grapes are processed differently because they have special properties that are released during the fermentation.
Black grapes are gently fed into a “de-stemmer” and removed from their stalks. The more green the stalks, the better it is to remove the grapes and stems. The grapes are usually macerated during this process and some juice is freed. If there is a little juice, but not necessarily 150 gallons, don’t worry. The juice will exit the grape during fermentation.
The black grapes and juice together are magic in waiting. They should be securely inside a container and wrapped or covered. As with the green grape must/juice, a dose of sulfur helps to protect against unwanted oxidation and bacterial growth. So, there, you have it. Your grapes have been processed. Now what?
Well, take a break. Let the must/juice come together over night. For green grape must, this helps to settle the vineyard lees. For black grape must, an extended soaking can help draw out some color. A cool or cold room and/or storage tank can aid this overnight period. Cooler temperatures slow the natural carbon breakdown and inevitable fermentation and help the juice colloids bind and settle.
One pre-fermentation trick I see repeatedly in wineries around the world is the use of dry ice in storage tanks used for black grape fermentations. Not only does carbon dioxide gas evacuate oxygen from the fermenter, dry ice also creates a natural cooling effect and negates the need for using a chilling (ethylene glycol) unit, which can be expensive. If you do invest in a glycol chilling system, or any cooling system for that matter, you are likely to have fewer headaches during than if you do not.
The next step is to find out what the sugar and pH levels are. Simply extract a bit of juice and let it settle for a thirty minutes. Then draw a clean sample from the top. To measure sugar, use a hydrometer. To measure the pH, use a pH testing kit. Record the initial pH of the must. Record the initial density of the sugars – the density will decrease as the fermentation moves forward. Maintaining a consistent and precise diary of the science of the winemaking is very important if you plan on making wine repeatedly.
Baring the need for any unforeseen additions (acid, base, nutrient stimulant – to adjust the must) you should be ready for the next step – inoculation.For black grapes, this is easy. If using cultured yeast, hydrate that yeast using tepid water. Wait twenty minutes, add a bit of the juice to the yeast and wait another fifteen minutes, then pour the foamy inoculate over the top of the grapes.
If you have an inert gas on hand (carbon dioxide, nitrogen, argon) administer enough to fill the open space (ullage) and seal the container. If you do not wish to use cultured yeast, simply administer gas into the ullage and seal the container. The native yeasts will eventually begin to break down the sugars and begin the fermentation.
Please note: As the fermentation begins a significant and dangerous amount of carbon dioxide is produced. The container you are using for any fermentation should be ‘sealed’ but it should also be allowed to breath.
Inoculating green grape must is a little more intricate. First, rack the clean must from the vineyard lees that have settled to the bottom of the storage tank. Siphoning is easy for small containers. A pump, hoses and receiving containers are best for bigger projects. Whether you are racking the clean must into carboys, barrels, or tanks fill each container only 80% of the way. The fermenting must will assume more space than the still must does as carbon dioxide is produced.
The green grape vineyard lees can be fermented separately or gently filtered and added to the clean must/juice. A pump and simple filter system can be of great benefit during this process.
Once you have clean must/juice in the container of your choice, you are ready to inoculate it. If using cultured yeast, first hydrate the yeast using tepid water. After twenty minutes or the yeast begin to foam. Add a bit of the must/juice to the yeast to drop the temperature 5˚ F. Repeat this step every 15-20 minutes until the temperature is within 10˚ of the must temperature. This slow process of tempering the yeast inoculate to the temperature of the juice ensures a safe fermentation. Now, add the inoculate to the must/juice.
The coming weeks will be best spent preparing for your next steps, and managing the fermentation. For green grape must, this is very easy. For black grape musts it is a bit more intricate. For any fermenting must, a daily log of temperature and sugar levels is required. If significant changes occur in temperature or there is a drastic reduction of sugars – usually the two coincide – begin checking the must more frequently. Try to keep the green grape must at 60˚. The black grape must should hang in around 80˚–90˚.
Do not do anything to the black grape must until you can press on the top and it appears as though the grapes have begun to float – the carbon dioxide of the fermentation is floating the grapes and compressing them into a “cap”. The cap should be submerged by hand or foot once a day. If you have a pump and a storage tank, the juice should drawn off from the bottom and passed over the top of the black grape must.
As the fermentation reaches ever closer to zero (and hopefully, eventually below zero) the amount of sugar remaining in the must will be depleted. The sugars will have been converted to alcohol and carbon dioxide. And because that conversion has less and less energy, the tumultuous nature of the fermentation will begin to slow down. This is when you need to have your next phase in place.
What is the next phase? Barreling and storage, of course. For black grape musts a gentle pressing of the skins is also needed. My suggestion, when the wine is finished fermenting and the lees have settled, (or in the case of a black grapes, the grapes have sunk into the juice that was once very turbid), a racking of clean wine to your preferred storage vessels should be scheduled.
White wine can go directly to a long-term storage vessel. There should be very little or any ullage in the receiving vessel. (In other words, don’t put five gallons into a 100-gallon container. Five gallons should be in a five-gallon container and sealed with a breathable closure. White wine lees can be discarded.
Black grapes produce lees as well, but the fermenter must be drained to a container, and the grapes must be pressed. The resulting wines – pre-press wine and press wine – should be kept separate. Each wine should be settled before being racked to a more permanent storage vessel. The ullage should also be minimal. This entire process might take two weeks or forty days.
Management of your facilities and fermentation(s) can aid the success of your project. If you have winemaking books on hand, they can help answer small questions and potential problems that might creep up.
Please see previous articles that address specific topics such as acid, tasting techniques, and general winemaking tips.